Description
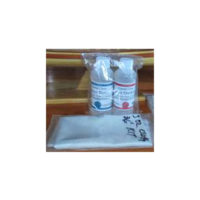
Krystal Clear Epoxy resin mixing and application instructions
Mix ratio is 1 part of A to 1 part of B. Try to be as accurate as possible with each portion the same. There is some leeway. Working time is about 40 minutes. The model’s surface should be smooth and dust free. Position the fiberglass cloth over the model, using clothes pins to hold it in place. Use your hand to smooth out any wrinkles and be sure the cloth covers the model everywhere. Pour half of part A and then B into a plastic mixing container and mix well. Try to avoid whipping and adding air bubbles. Stir smoothly and back and forth. About a minute of mixing should be good. If you have some acetone or denatured alcohol available, add about 5% (tspn) to thin the mix a little bit. If you don’t have any, it is okay too. Warming the bottle of Part A in a glass of hot water will help it flow easier. Take a 1″ to 1 1/2″ chip brush and cut about 3/8″ off the end of the brush’s bristles so that it is straight across and a little more rigid. This will help with spreading the epoxy. Start in the center of the bottom and brush the mixture on with a motion that spreads it evenly. If you apply to thickly in an area, it will puddle and you don’t want that. Use only enough to saturate the cloth and make it disappear. The use of a small stiff piece of cardboard, plastic or a squeegee can aid in spreading it once it is applied. Apply from the middle, working out to each end so you are always pulling the cloth tight. At the bow and stern, allow the cloth to run by stem. You will not be able to wrap the cloth. Work out any air bubbles, and make sure it is tight, smooth and you can see the weave of the cloth. After a couple of hours it should be stiff and partially cured. This is a good time to take a razor knife and trim your cloth along the sheer line. It can be done while it is hard, but is easier at this stage. The second coat will fill in the weave. Let dry overnight and lightly sand out any imperfections and apply a second coat being aware of sags, drips, or excess epoxy. The surface can be sanded again to a super fine finish with another thin finish coat for a high gloss finish or apply polyurethane, varnish or prepare for paint. The model will now be very tough and durable.